BitLocker Volume Details in Splunk

Monitoring BitLocker Volume Details

I was recently asked if BitLocker encryption details can be reported on in Splunk.

The answer is yes, if you send the right data to Splunk.

There is a Windows Event Log (Microsoft-Windows-BitLocker/BitLocker Management) that will log when someone encrypts or decrypts a volume.  This information is good to know, but what happens after a volume is decrypted… after days, weeks, or months has passed you will need to search back an extended amount of time to see that activity.  And eventually these events will be removed from Splunk based on the index’s retention.

I have created a solution that will allow you to see the latest volume status (latest based on an interval you can configure; the default is every 4 hours).  In addition to whether BitLocker Encryption is enabled for each volume, the script also records the volume type (Operating System or Data) and Drive Type (Fixed or Removable) so you can filter the dashboard to view the status for scenarios where you are only concerned with Fixed disks, Operating System disks, or Data disks.

Universal Forwarder Inputs

  1. Download the ut_splunkforwarder_inputs_bitlocker app from GitHub – BeckhamTX/Splunk-Inputs-WinSysAdminToolkit
  2. Configure the app
    • You must configure the index that you want to send the BitLocker data to:
      • Create a new folder named local inside ut_splunkforwarder_inputs_bitlocker
      • Create a new file named inputs.conf inside ut_splunkforwarder_inputs_bitlocker\local
      • Edit inputs.conf to include the following, replacing myIndex with the index you want to send to
        [powershell://BitLockerVolumeDetails]
        index = myIndex
    • You can optionally adjust the schedule that the volume details are gathered on:
      • Edit ut_splunkforwarder_inputs_bitlocker\local\inputs.conf
      • Add the following line replacing 6 */4 * * * with your custom schedule
        schedule = 6 */4 * * *
        The schedule can be in one of the following two formats:

        Format Syntax Example
        Cron Cron notation (minute, hour, day of month, day, day of week 6 */4 * * *
        would be at 6 minutes past the hour, every 4 hours (4.00 am, 8.00 am, 12.00 pm, 4.00 pm…)
        Seconds An integer (specifically the number of seconds before it runs again) 7200
        would be every 7200 seconds (every 2 hours)
  3. Deploy the ut_splunkforwarder_inputs_bitlocker app to your Universal Forwarders.
    You have several options to get this configuration out to all of your hosts: You may be running a Splunk Deployment Server.  If not, you can use systems management tools such as SCCM/MEMCM.
  4. The Universal Forwarders must be restarted to start using the new BitLocker input configuration.  This can be done using the following command:
    “C:\Program Files\SplunkUniversalForwarder\bin\splunk.exe” restart

Splunk Dashboards

There are two dashboards I have created as part of my Windows SysAdmin Toolkit Splunk app.

This app is not (yet) on Splunkbase, so I will post the dashboard source code here soon.  (If you would like the dashboard source code before I get to post it, please leave a comment on here and I can send it to you directly.)

BitLocker – Comprehensive Overview of Latest Volume Details

This dashboard includes:

  • a few statistics about drive encryption across all hosts
  • the latest status for each volume on all hosts (there are several filter options available here)
  • events from the BitLocker Management Windows Event log for all hosts

BitLocker – Details for a Host

This dashboard provides details for a single host (although you can wildcard the host name if you want to see details for multiple hosts with a common naming pattern.)

An Overview of Windows LAPS

What is Windows LAPS?

Windows LAPS (Local Administrator Password Solution) automatically manages a local administrator account’s password: changing the password when it expires (using password length and complexity settings) and backing up the password to Active Directory so it is available for authorized users to retrieve.

Windows LAPS was made available with the April 2023 Cumulative Update for the following Operating Systems:

  • Windows 11 22H2
  • Windows 11 21H2
  • Windows 10 (those editions still supported by Microsoft)
  • Windows Server 2022
  • Windows Server 2019

Windows LAPS is not available for Windows Server 2016, but you can continue to use legacy LAPS with it.

Windows LAPS is a whole new solution for managing the local administrator password and is not just an update of the legacy LAPS solution that was originally released in 2015.  It includes much of the same functionality of legacy LAPS, and also includes a couple of new things:

  • Supports encrypting passwords stored in AD
  • Can store password history in AD (for encrypted passwords only)
  • Supports saving the password to Azure AD instead of Windows Server (on-prem) AD


Comparing Windows LAPS and Legacy LAPS

Comparing Windows LAPS and Legacy LAPS
Windows LAPS Legacy LAPS
Password-management bits Included with the April 2023 Cumulative Update for Windows The client-side extension must be installed on each computer.
Frequency of processing the LAPS policy cycle This is hard-coded in Windows to 1 hour

The Invoke-LapsPolicyProcessing PowerShell cmdlet can be used to trigger processing in addition to gpupdate /force.

Since this was a Group Policy Client-side extension, this was done at the same time as a group policy refresh.

gpupdate /force will force the processing of Group Policy

Configuration options Group Policy

Configuration Service Provider (such as Intune – but this option is currently not available at the University)

Group Policy
Group Policy settings location Computer Configuration – Policies – Administrative Templates – System – LAPS Computer Configuration – Policies – Administrative Templates – LAPS
Where is the password stored in AD All Windows LAPS attributes are confidential attributes:

msLAPS-PasswordExpirationTime: This is a regular attribute that stores the date and time that the LAPS password will expire / when it will be reset, calculated by adding the value of the Password Age (Days) setting to the time the password was last set

msLAPS-Password: A clear-text string that contains the name of the managed account, the timestamp of the password update, and the current password

msLAPS-EncryptedPassword: The encrypted current password

msLAPS-EncryptedPasswordHistory: Contains the encrypted previous passwords (it will store as many of the previous passwords as it is configured to, which allows for a maximum of 12)

msLAPS-EncryptedDSRMPassword: This setting only pertains to Domain Controllers.

msLAPS-EncryptedDSRMPasswordHistory: This setting only pertains to Domain Controllers.

ms-mcs-AdmPwd: This is a confidential attribute where the password is stored

ms-mcs-AdmPwdExpirationTime: This is a regular attribute that stores the date and time that the LAPS password will expire / when it will be reset, calculated by adding the value of the Password Age (Days) setting to the time the password was last set

Is the password that is stored in Active Directory encrypted? It depends on the LAPS policy in use when the password is saved in AD. No
Where can the password be backed up to? Windows Server (on-prem) Active Directory or Azure Active Directory. Windows Server Active Directory only.
Who can access the password in AD If the password is not encrypted (msLAPS-Password) you must have access to the confidential attribute in AD.

If the password is encrypted (msLAPS-EncryptedPassword, msLAPS-EncryptedPasswordHistory) you must have access to the confidential attribute in AD AND be an authorized password decryptor (refer to the Windows LAPS Policy Settings section below).
Note that each encrypted password in the password history can/may have a different decryptor.

You must have access to the confidential attribute in AD.

Prerequisites for Using Windows LAPS

  1. The computer object must have permission to write its password to itself in Active Directory.
  2. The computer must be running an Operating System for which Windows LAPS is available.
  3. The computer must be updated with the April 2023 Cumulative Update for Windows or later.
  4. The computer must have a Windows LAPS policy assigned to it.
  5. The computer must be able to reach a Domain Controller.


Windows LAPS Policy Settings

The following settings are located in Computer Configuration – Policies – Administrative Templates – System – LAPS:

Setting Description
Post-authentication actions If enabled, you can set an action that will be triggered after the successful authentication of the account whose password is being managed.

The available actions are:

  • Take no actions
  • Reset the password
  • Reset the password and logoff the managed account
  • Reset the password and reboot the device

Set the grace period to the time you want it to wait after the authentication before the action is triggered.

The grace period must be set greater than 0; if set to 0 the action will not be triggered.

Password Settings If enabled, you can configure the following aspects of the password that is generated:

Password Complexity: Determines what type of characters are used to generate the password. The available actions are:

  • Large letters
  • Large letters + small letters
  • Large letters + small letters + numbers
  • Large letters + small letters + numbers + specials

Password Length: Determines how many characters the password will be in length.  This must be a number from 8 – 64.  The default value is 14.


Password Age (Days): This is the number of days that will be used to set the password expiration time.  This must be a number from 1 – 365.  The default value is 30.

Name of administrator account to manage The name of the local administrator account whose password is managed.

Only set this if you want Windows LAPS to manage an account other than the built-in Administrator.

The default, when not specified, is the built-in Administrator (by its well-known RID).

Notes: If you specify a disabled account, the password will be managed by the account will not be enabled by LAPS.  If you specify an account that does not exist, .  If you specify an account that is not a member of the local Administrators group it will not be added to the local Administrators by LAPS.

Enable password encryption If enabled, the password is encrypted before it is backed up to AD.

If disabled, the password is not encrypted before it is backed up to AD.

If not configured, the default value is Enabled.

Enable password backup for DSRM accounts This setting only pertains to Domain Controllers.
Do not allow password expiration time longer than required by policy If enabled, LAPS will adhere to the computer’s password settings policy and the password will be reset when the password has expired based on the computer’s password settings policy.  The new expiration is then set so it adheres to the computer’s password settings policy.

If disabled, the expiration of the password set by LAPS could exceed the requirement of the computer’s password settings policy.

If not configured, the default value is Enabled.

Configure size of encrypted password history If enabled, you can specify how many older encrypted passwords to store in AD.  This must be a number from 0 – 12.

This setting only applies when encrypted passwords are being backed up to AD.

This setting may help out when reverting to a VM shapshot where an older password was in use at the time the snapshot was taken.

The default value, if not configured, is 0.

Configure password backup directory Determines where the password is backed up to.

Options:

  • 0: Disabled
  • 1: Azure AD only
  • 2: Windows Server (on-prem) AD only

The default value when not specified is 0 (the password will not be backed up).

Configure authorized password decryptors When enabled, you will specify the user or group that is authorized to decrypt the encrypted password in AD.

You must provide one of the following as the decryptor

  • The SID of the group or user
  • The name of the group or user in the following format: AUSTIN\<name>

Warning: If the device cannot resolve the SID or name provided, the password will not be backed up.

This setting only applies when encrypted passwords are being backed up to AD.

The default value when not specified is the Domain Admins group.

Post-authentication actions Specify an action that will be triggered after the successful authentication of the account whose password is being managed.

The available actions are:

  • Take no actions
  • Reset the password
  • Reset the password and logoff the managed account
  • Reset the password and reboot the device

Set the grace period to the time you want it to wait after the authentication before the action is triggered.

The grace period must be set greater than 0; if set to 0 the action will not be triggered.

The default behaviour, when this setting is disabled or not configured,  is to reset the password and logoff the managed account after 24 hours.
If you want it to take no action, enable this setting and select Take no actions.


Retrieving a LAPS Password

There are several methods to retrieve the LAPS password.

Using the Active Directory Users and Computers (ADUC) Console

  1. Open the Properties for the computer.
  2. Select the LAPS tab.

    On the LAPS tab of the computer’s Properties page:

    • The Current LAPS password expiration is displayed.
    • You can specify a new password expiration.
      After specifying the new expiration click OK or Apply.
    • You can make the password expire now by clicking on the Expire now button and then clicking on OK or Apply.
      This will set the expiration to the current date and time.
      The password will not actually be changed immediately on the computer, but when it next processes LAPS policy.
    • The LAPS local admin account name is displayed.
    • The LAPS local admin account password is masked by default
      • Clicking Copy password will put the clear-text password on your clipboard without unmasking it here.
      • Clicking Show password will display the password in clear text here.

    Note: You cannot view the password history from here.  You must use PowerShell to access the password history.

Using Active Directory Administration Center

  1. Open the properties for the computer.
  2. Scroll down to the Extensions.
  3. Select the LAPS tab.

    The LAPS tab is available just as it would appear in ADUC.  Refer to the ADUC section above for details.

Using PowerShell

You can retrieve the LAPS password using the Get-LapsADPassword cmdlet.

  1. Use the Get-LapsPassword cmdletGet-LapsADPassword -Identity <computername>
    will return the current password in a Secure String object.The Account property shows the managed account name.The Password property contains the password.The PasswordUpdateTime shows when the password was updated.The ExpirationTimestamp shows when the current password expires/when a new password will be required.The DecryptionStatus property will show Success if you are allowed to decrypt the password.  It will show Unauthorized if you are not.The AuthorizedDecryptor property will show the user or group that can decrypt the password.Note: When using tab-completion it is easy to accidentally run the Get-LapsAADPassword instead.  This is the cmdlet used to retrieve the password from Azure Active Directory.
  2. Or to get the password in plain text

    Get-LapsAdPassword -Identity <computername> -AsPlainText
    will return the current password in plain text.
  3. Or to get the password history in plain text

    Get-LapsAdPassword -Identity <computername> -AsPlainText -IncludeHistory
    will return the password history in plain text
    The number of passwords in the password history depends on the LAPS policy applied and how many times the password has been changed by LAPS.
    Each password in the password history can have a different Authorized Decryptor, depending on what was specified in the policy when the password was encrypted and stored in AD.The AuthorizedDecryptor shows who can decrypt the password.
    The DecryptiomStatus shows whether the password was successfully decrypted for the user running the cmdlet.In this example, the user running the cmdlet can see the latest password as they are a member of the Authorized Dectryptors.  They cannot see the previous password as the Authorized Dectryptors for it is a different group that the user is not a member of.


Windows Event Log

A new Windows Event Log channel has been created for Windows LAPS.

In Event Viewer, navigate to: Application and Services Logs – Microsoft – Windows – LAPS – Operational.


PowerShell Module

Below are some helpful cmdlets included in the LAPS PowerShell module.

Cmdlet Description
Get-LapsAdPassword Gets the escrowed password(s) from Windows Server Active Directory.
Review the Retrieving a LAPS Password section above for details and examples.
Invoke-LapsPolicyProcessing Initiates the processing of the current LAPS policy, independent of the hourly processing cycle).
Reset-LapsPassword Attempts to immediately change the managed account’s password (whether or not it has expired).


Frequently Asked Questions

Q1: Can I initiate a password change ahead of the expiration time?

A1: There are a couple of ways to have the managed password changed:

  • Use the Reset-LapsPassword cmdlet, which will result in LAPS attempting to reset the password immediately.
  • Edit the password expiration for the computer to the current time, which will result in the password being reset the next time LAPS policy is processed on the computer.

Q2: What happens if the computer cannot reach a Domain Controller when the password expires?  Will the password be set without the new password being backed up in AD?

A2: As with legacy LAPS, Windows LAPS will first escrow the new password in Active Directory.  Only if that is successful with the password actually be changed on the computer.

Q3: Who can decrypt an encrypted password in Active Directory?

A3: This is specified by the user or group set as the authorized password decryptors in the LAPS policy at the time the password was stored in AD.

Is this setting was not set, the decryptors default to the Domain Admins.

Q4: What happens to the password and password expiration stored in Active Directory when Windows LAPS manages the password?

A4: The attributes used by legacy LAPS are not modified by Windows LAPS.  After Windows LAPS starts to manage the account’s password the legacy LAPS attributes will remain intact.  Windows LAPS does not clear out the Legacy LAPS attributes.
This can be confusing, having two sets of password attributes, but you should avoid programmatically clearing out all of the legacy LAPS attributes on all of your computers without verifying they are no longer valid.  You could be clearing out currently-set passwords making them unavailable (Windows LAPS is not available for Windows Server 2016 which will continue to use legacy LAPS if enabled.  Windows LAPS may not have changed the password yet if there is no Windows LAPS policy assigned to the computer).

Q5: What will happen if a computer has both a legacy LAPS and Windows LAPS policy applied to it?

A5: Windows LAPS will manage the password.

Q6: Will Windows LAPS save both an unencrypted and encrypted password to AD?

A6: No, Windows LAPS will store only an encrypted password or unencrypted password based on the computer’s policy settings.

Q7: What will happen if the account I specify as the Name of administrator account to manage does not exist?

A7: Windows LAPS policy processing will fail.  It can not manage an account that does not exist.  This scenario can lead you to being locked out of the computer / not having a way to get admin access to it.

Q8: What will happen if the account I specify as the Name of administrator account to manage is disabled?

A8: Windows LAPS policy processing will succeed.  It will manage the account’s password, but it will not enable the account.  The account must be enabled before it can be used.  This scenario can lead you to being locked out of the computer / not having a way to get admin access to it.

Q9: What will happen if the account I specify as the Name of administrator account to manage is not a member of the local Administrators group?

A9: Windows LAPS policy processing will succeed.  It will manage the account’s password, but it will not add it to the Administrators group.  This scenario can lead you to being locked out of the computer / not having a way to get admin access to it.

Q10: Can the password of more than one account be managed by Windows LAPS?

A10: No, only one account can be managed.

Q11: Should I remove (delete or unlink) my GPO(s) that configure Legacy LAPS?

A11: To “clean things up”, you can unlink or delete any GPOs that configure Legacy LAPS as long as you do not have any computers running an operating system that Windows LAPS is not available on.  If you need to keep using Legacy LAPS for older operating systems, you can optionally use filtering (security filtering or WMI filtering) on the GPO to have it only apply to these computers – although you do not need to do anything as Windows LAPS will manage the password in the scenario where Windows LAPS and Legacy LAPS are both enabled.

Setting the Security Logon Banner Message on iDRAC 9 (14G Servers)

There are a lot of new features available on the iDRAC9 which comes with 14G Dell servers.
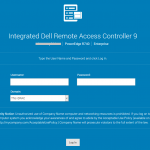
One of these features that I have implemented right away is the logon banner message, which is displayed as the Security Notice on the logon page.

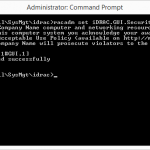
To set the a custom message you can use racadm:

  • Local racadm:
    racadm set iDRAC.GUI.SecurityPolicyMessage “Message Here.”
  • Remote racadm:
    racadm -i -r <DNS Name or IP of iDRAC> set iDRAC.GUI.SecurityPolicyMessage “Message Here.”

Monitoring a Service in SCOM

Overview

Monitoring a service in SCOM is very easy to set up – thankx to the Windows Service Management Pack Template.  Many times there is a Management Pack already created that you can import to monitor a service (Active Directory, SQL Server, etc.)  When there is no Management Pack available for a Specific Service, or one is too complex for your environment, you can use this template to configure monitoring.  This quick process will create the Monitors and Rules necessary to:

  • Verify the service is running, and alert when it is stopped
  • Alert when performance thresholds are met
  • Collect performance data (% processor time, )


Setting up the Service for Monitoring

  1. Go to the Authoring workspace in the SCOM Console.
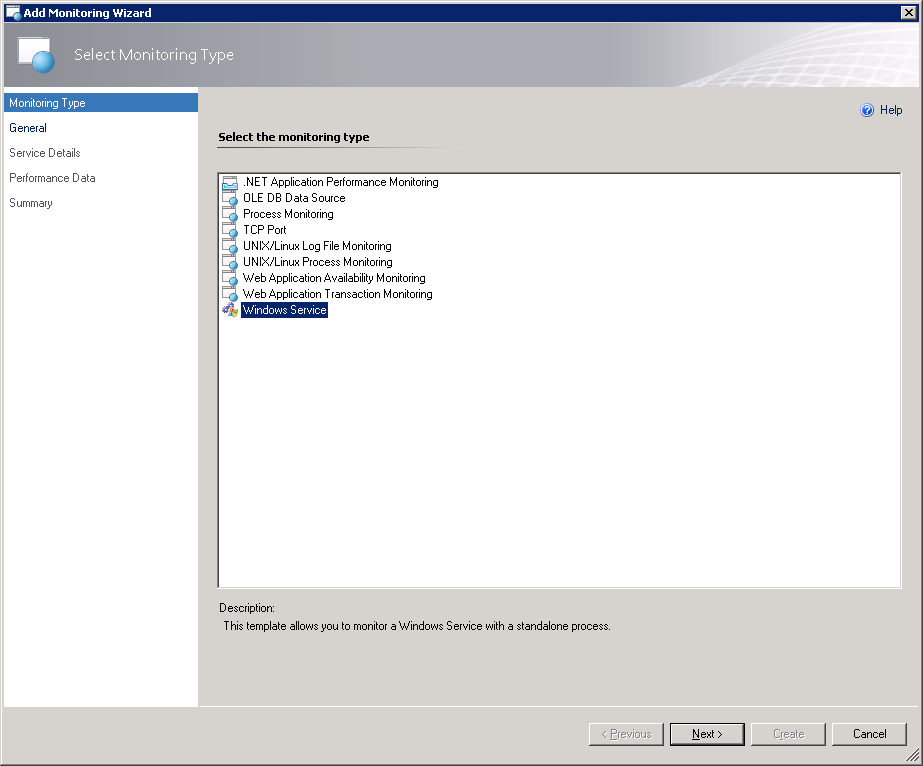
  2. Right-click anywhere in the Management Pack Templates node, and select Add Monitoring Wizard.
    The Add Monitoring Wizard will launch.
  3. On the Monitoring Type page, select Windows Service.
    CreateServiceMonitor-Wizard-02
  4. On the General Page:
    Provide a Name for the Service.
    Optionally provide a Description.
    Select an existing Management Pack, or click the New button to create a new Management Pack to add the monitoring objects to.
    CreateServiceMonitor-Wizard-03
  5. On the Service Details Page:
    Provide a service to monitor.  Type in the Service Name, or click on the ellipsis button to bring up a Window from which you can select a Service.
    If you type in the name, you can find the Service Name when looking at the Service Properties in the Services Console.
    CreateServiceMonitor-Wizard-04-c
    If you want to select the Service from a list of installed services, click on the ellipsis button.  The Select Windows Service window will appear.  You can look through and select a service installed locally, or connect to a different computer if the desired service is not installed locally.
    CreateServiceMonitor-Wizard-04-b
    Select a group to Target monitoring of this service to.
    Select whether you want to monitor the service only if its Startup Type is Automatic.
    CreateServiceMonitor-Wizard-04
  6. On the Performance Data page, you can specify whether you want alerts generated when CPU or Memory usage exceeds a specific threshold.
    In the Perofrmance counters section, check the box to generate an alert for CPU and/or Memory usage, and provide the thresholds you want to be alerted on.
    In the Performance counter sampling section, specify the number of samples in a row that have to exceed the threshold in order to generate an alert, and the sampling interval.
    Be careful with how frequent your sample interval is – the lower the internal, the more space it will use in the database.
    CreateServiceMonitor-Wizard-05
  7. The Summary page provides a summary of the service monitoring configuration you have provided.  Review the details and click Create to set up the Service Monitoring for the Service, or the Back button to make any changes to the configuration.


Making Changes to the Configuration of the Windows Service

If you need to make and changes to the monitoring configuration for the Windows Service:

  1. Go to the Authoring workspace in the SCOM Console.
  2. Navigate to Authoring – Management Pack Templates – Windows Service.
  3. Right-click the service and select Properties.
  4. The Service Properties window will appear, where you can reconfigure the monitoring for the service.

CreateServiceMonitor-Wizard-07


A Look at What the Template Does

Using the Windows Service Management Pack Template is a quick and easy way to configure Monitors and Rules.

To see the objects configured using the template, right-click on the service and select View Management Pack Objects – <Object Type>.

CreateServiceMonitor-Wizard-08

When viewing the Rules, note that there are six Rules, including ones to collect CPU and Memory performance data.

CreateServiceMonitor-Wizard-09

One of the really nice things about using the template is that the Collect Process\%Processor Time Rule is configured to account for multi-CPUs.  Note the ScaleBy property, which will take the % Processor Time value and divide it by the number of logical processors.
CreateServiceMonitor-Wizard-10

This is necessary because the Performance Counter does not take multiple CPUs into consideration.  While you think the maximum value for % CPU Time is 100%, The actual maximum value is 100 times the number of logical processors.  If you had created your own Performance Collection Rule, there is no way to add the ScaleBy option – other than manually editing the Management Pack’s XML.

There are also a number of Monitors created for you: to alert when service is not running, or when CPU/Memory performance thresholds have been met.

CreateServiceMonitor-Wizard-11


Creating a View to Display Performance Data

You may want to create a View to display CPU or Memory usage data that is being collected now.

  1. Go to the Monitoring workspace.
  2. Navigate to the folder named for the Management Pack you want to create the View in.
    (If you create a view in the root level of the Monitoring node, it will be created in the Default Management Pack – which you do not want to do.)
  3. Right-click on the folder and select New – Performance View.
  4. The Properties window will appear.
    Provide a name for the View.
    Click the ellipsis button next to Show data related to.  The Select Items to Target window will appear.  Select the name of the Windows Service that you created.
    Under Select conditions, check the box labelled collected by specific rules.
    Under Criteria description, click on the word specific in collected by specific rules.  Select the name of the Rule that collects the performance data (in the case for CPU usage, select Collect Process\% Processor Time.)
    CreateServiceMonitor-Wizard-13
  5. You can now review the performance data for the service.  As with any performance view, select the items (computers) from the legend that you want to appear on the graph.
    CreateServiceMonitor-Wizard-14

Using Splunk to Identify Account Logon Failures and Lockouts in Active Directory

Working as both an AD Domain Admin and Splunk Admin, I am working on an Active Directory app for Splunk to present useful statistics as well as provide search forms and reports to be used by AD and Help Desk support staff.
This is the first in a series of blog posts I will make on the development of this app.


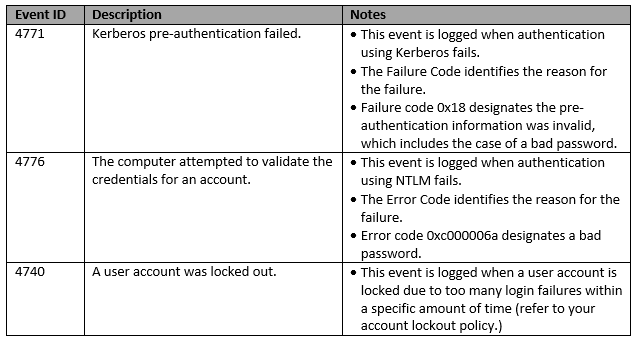
Step 1: Identify which Event IDs are related to logon failures and lockouts.

FailedLogonsAndLockouts-EventIDs


Step 2: Contruct the search strings that will be used to perform relevant searches

  • index=“ad” source=”WinEventLog:Security” Account_Name=<accountname> EventCode=4771 Failure_Code=”0x18″ earliest=<-4h> | table _time Client_Address Account_Name EventCode Failure_Code
  • index=“ad” source=”WinEventLog:Security” Logon_Account=<accountname> EventCode=4776 Error_Code=”0xc000006a” earliest=<-4h> | table _time Source_Network_Address Logon_Account EventCode Error_Code Logon_Type
  • index=“ad” source=”WinEventLog:Security” Account_Name=<accountname> EventCode=4740 earliest=<-4h> | table _time Caller_Computer_Name Account_Name EventCode

Step 3: Create a search form in Splunk

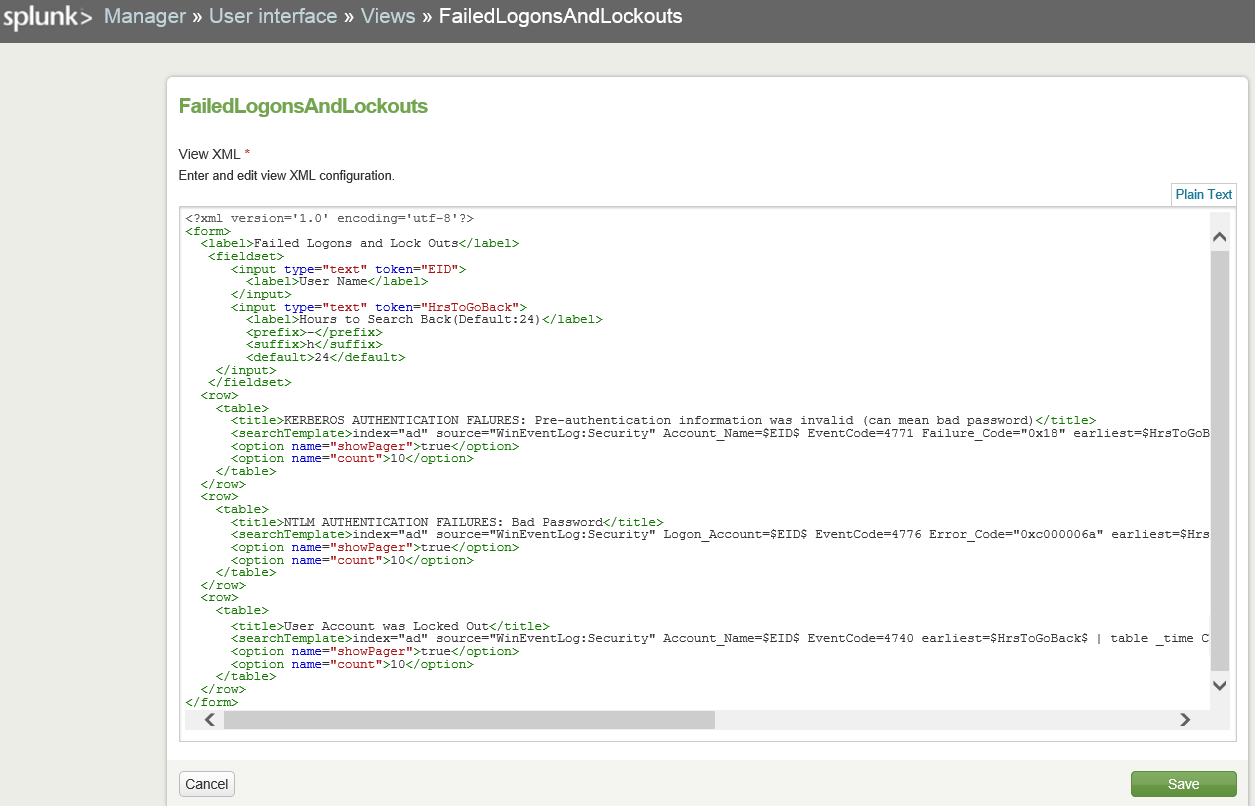
The search form that I created includes two input fields: account name and how many hours to search back.  The input tokens are plugged into the search strings to customise the search.

FailedLogonsAndLockouts-FormXML


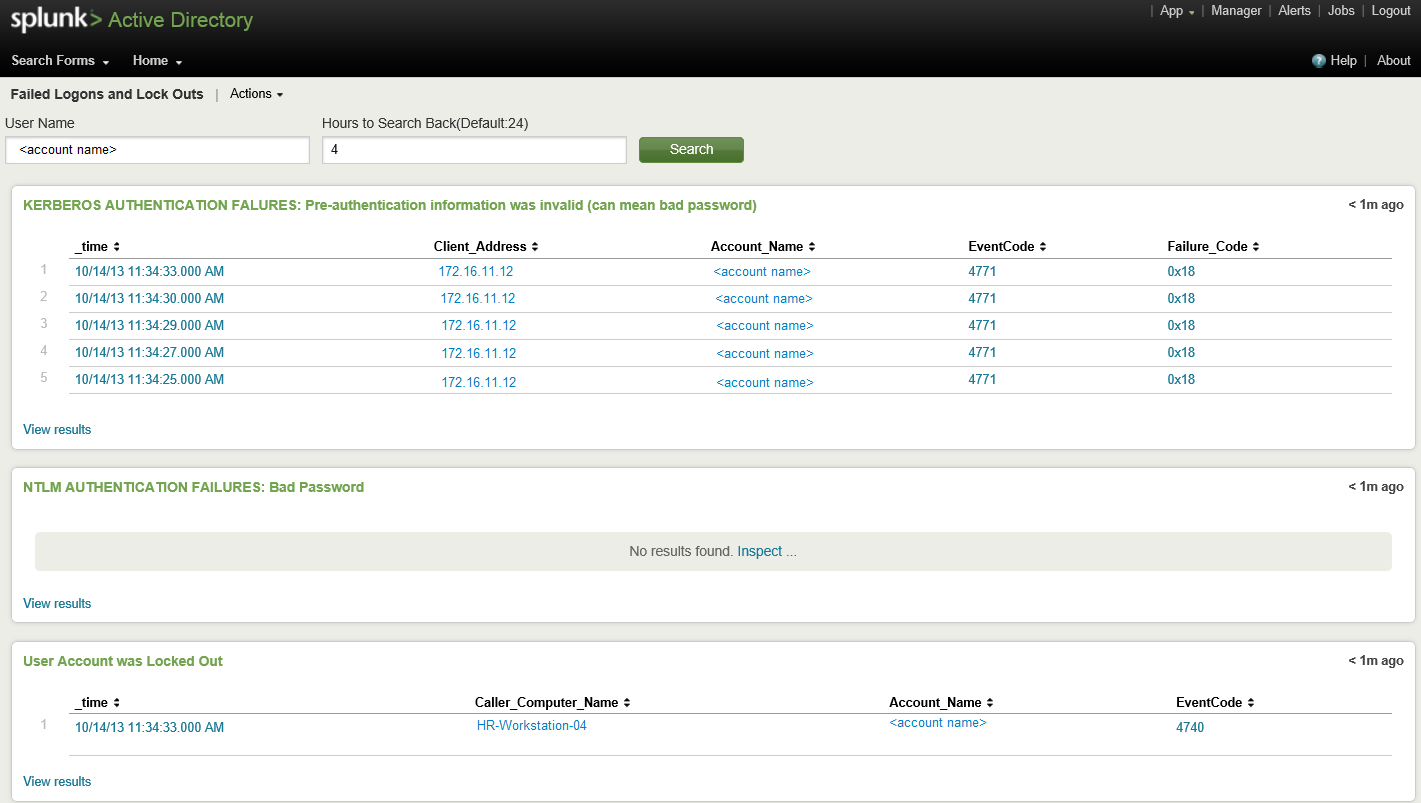
Search Form:

FailedLogonsAndLockouts-SearchForm

NIC Teaming in Windows Server 2012 – Part 2: PowerShell Method

This is the second in a two-part series on NIC Teaming in Windows Server 2012.  Part 1 focused on the GUI method (using Server Manager.)  Part 2 focuses on using PowerShell.

Depending on its configuration, NIC Teaming provides the following benefits:

  • bandwidth aggregation – If you team 2 NICs, you have the capability to double your network throughput.
  • resisiliancy to a dropped network connection – Our data centre has duplicate network infrastructure that connects to all servers: an A network and a B network.  When network maintenance needs to be performed it is done on each network separately: when maintenanice is performed on the A network, the B network stays online.  Each server has a Team that consists of a NIC on the A network and a NIC on the B network to avoid loss of connectivity when one of the networks goes down temporarily for maintenance.

In older Windows operating systems in order to create a NIC team you had to use software provided by the NIC vendor.  Server 2012 brings this functionality into the OS.  With NIC Teaming functionality now built into Windows, the process is much simpler, consistent (does not matter what vendor has manufactured the NICs), and is supported by Microsoft (since Teaming using vendor software is not supported by Microsoft, PSS would often request a Team be broken to verify the Team is not causing any issues.)


Creating a NIC Team Using PowerShell

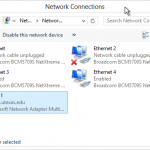
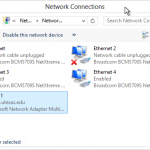
  1. Determine the names of each NIC that you want to add to the team.  This can be done from Network Connections.
    01
  2. Launch PowerShell (Run as Administrator.)
  3. Run the following cmdlet, replacing the values of the -Name and -TeamMembers parameters for your own values:
    New-NetLbfoTeam -Name “Team 1” -TeamMembers “Ethernet 3″,”Ethernet 4” -TeamingMode LACP -LoadBalancingAlgorithm TransportPorts -Confirm:$false Notes on Parameters:
    -TeamMembers accepts a coma-separated list of NIC names
    -Confirm:false prevents the confirmation prompt from appearing
    -TeamNICName (an optional parameter) can be used to name the Virtual/Teamed NIC.  If this parameter is not used, the Team name will also be used for the name of the Virtual/Teamed NIC.
    02
  4. A new Virtual/Team NIC will appear in Network Connections.
    03
  5. Use the following PowerShell cmdlet to set the IP config of the Virtual/Team NIC, replacing the example values for each paramter with your own values:
    New-NetIPAddress -InterfaceAlias “Team 1” -AddressFamily IPv4 -IPAddress 1.2.3.4 -DefaultGateway 1.2.3.1 -PrefixLength 28

    Note: The PrefixLength parameter relates to the subnet mask.  In this example, the PrefixLength is set to 28 because the subnet mask is 255.255.255.240 (it is a /28 network.)
  6. Use the following PowerShell cmdlet to set the DNS servers for the Virtual/Team NIC, replacing the example values for each paramter with your own values:
    Set-DnsClientServerAddress -InterfaceAlias “Team 1” -ServerAddresses “128.83.185.40”,”128.83.185.41″

Additional NIC Teaming Cmdlets

Additional PowerShell cmdlets dealing with NIC teaming are available on the following techNet article:

http://technet.microsoft.com/en-us/library/jj130849.aspx

NIC Teaming in Windows Server 2012 – Part 1: GUI Method

This is the first in a two-part series on NIC Teaming in Windows Server 2012.  Part 1 focuses on the GUI method (using Server Manager.)  Part 2 will focus on using PowerShell.

Depending on its configuration, NIC Teaming provides the following benefits

  • bandwidth aggregation – If you team 2- 1 GB NICs, you have the capability to double your network throughput.
  • resisiliancy to a dropped network connection – Our data centre has duplicate network infrastructure that connects to all servers: an A network and a B network.  When network maintenance needs to be performed (firmware updates on switches, etc.) it is done on each network separately: when maintenanice is performed on the A side, the B side stays online.  Each server has a Team that consists of a NIC on the A network and a NIC on the B network.

In older Windows operating systems in order to create a NIC team you had to use software provided by the NIC vendor.  Server 2012 brings this functionality into the OS.  With NIC Teaming functionality now built into Windows, the process is much simpler, consistent (does not matter what vendor has manufactured the NICs), and is supported by Microsoft (since Teaming using vendor software is not supported by Microsoft, PSS would often request a Team be broken to verify the Team is not causing any issues.)


Creating a NIC Team Using Server Manager

  1. Launch Server Manager.
  2. Select Local Server.
    (You can actually configure a NIC Team on one – or more – remote servers by selecting All Servers and then adding servers to the console.)
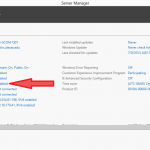
  3. Click on the (Disabled or Enabled) link next to NIC Teaming.
    01b
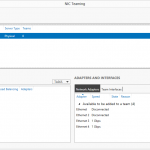
  4. The NIC Teaming window will appear.
    02
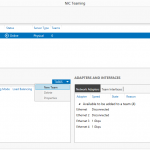
  5. At the top right of the Teams pane, select New Team from the Tasks menu.
    03
  6. A second NIC Teaming window will appear.
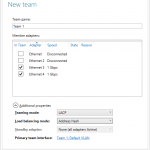
    1. Provide a Name for the Team.
    2. Select the NICs that you want to add to the Team.
    3. Click on the expand arrow next to Additional Properties.
    4. Select a Teaming Mode.
    5. Select a Load Balancing Mode.
    6. Click OK to close this window.
      05
  7. A new Virtual/Team NIC will appear in Network Connection.  configure TCP/IP for this NIC as you would any other NIC.
    07

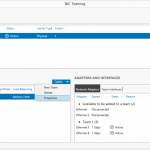
To edit the properties or delete a NIC Team, select the Team in the Teams pane and select Properties or Edit from the Tasks menu.
08

“SQL Reporting Server could not be contacted” when installing (upgrading to) SCOM 2012 SP-1

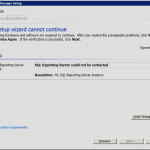
When upgrading my test SCOM server from RTM to SP-1, I got an error during the prerequisite check: “SQL Reporting Server could not be contacted.”   I verified that ReportServer was available, and the resolution did not offer anything helpful.

 SQL Reporting Server could not be contacted

When first installing SCOM several months ago I had configured SSRS to only use https.  One of the troubleshooting steps I performed to try to resolve this problem was re-enabling http, which made the prerequisite check pass.

Searching the registry for the SSRS http URL, I found two places that I needed to modify in order to get the prerequisite check to pass using https only.  Edit the ReportingServerUrl value located under both of the following keys: change http to https and :80 to :443.

  • HKLM\Software\Microsoft\Microosft Operations Manager\3.0\Reporting
  • HKLM\Software\Microsoft\System Center Operations Manager\12\Reporting


Of course, I could have just continued with the upgrade when I found the cause of the problem, leaving http enabled temporarily, since it made the prerequisites pass, but I was trying to avoid any additional problems in the future (additional upgrades, etc.) after setting it back to https only.


Creating Cascading Parameters with SSRS

I was creating a report today for servers with a specific Operating System where I needed to include two parameters (Operating System and Service Pack level.)  The values of the second parameter need to be dynamic based on the value selected for the first parameter.  This can be accomplished using cascading parameters.

  1. Create the first parameter (OSVersion) for the Operating System.
  2. Create a new Dataset (OSServicePacks) (with a query that references the first prompt) that will be used to populate the values for the second parameter.
    (I created an expression for my query, because I want to search for the word Server and the Windows Version, which is particularly necessary since Windows 7 and Server 2008 R2 are both version 6.1
    =”SELECT DISTINCT v_GS_OPERATING_SYSTEM.CSDVersion0 FROM v_R_System JOIN v_GS_OPERATING_SYSTEM ON v_R_System.ResourceID = v_GS_OPERATING_SYSTEM.ResourceID WHERE v_R_System.Operating_System_Name_and0 LIKE ‘%Server%” & Parameters!OSVersion.Value & “%'”)
  3. Create the second parameter (OSSP) for the Service Pack selection.  Because I want the values of this parameter to be dynamic based on the various Service Pack levels of servers with the specified Operating System I have gone to the Available Values section of the Parameter Properties window and made the following selections
    • Select from one of the following options: “Get values from a query”
    • Dataset: OSServicePacks
    • Value Field: The field that will contain the value of the parameter
    • Label Field: The field that will contain the label for the parameter – the text that will actually appear in the parameter drop-down list (this can be the same as the Value Field)
  4. Create the Dataset that will return the data for the body of the report (that will reference one or both of the parameters.)
  5. Run the report.  The second parameter will be greyed out until a selection is made for the first parameter.  Then the values in the second parameter will be dynamically populated.
  6. If the value for the first parameter is changed, the values for the second parameter will be re-populated based on the new value for the cirst parameter.

Social Widgets powered by AB-WebLog.com.