
Here’s the instruction on how to install CLion and C++ compiler on your PC/Mac. Please follow every step carefully and if you face any unexpected problems, please let TA/LAs know.
Clion Installation
(1) Make sure you have already completed to apply for a student license.
(2) Download CLion from JetBrains site. Select your OS type (Windows/macOS) and then download it. If you use Macbook, make sure you select the right CPU type (Intel/Apple Silicon).
For Windows:
(3) Click the downloaded .exe file to install. On the screen that asks you to create associations, select all.

For macOS:
(3) Click the downloaded .dmg file to install. Drag CLion icon to Applications folder.
(4) Now, you can find CLion icon and launch it! You might see a message “CLion is an app downloaded from the Internet ….” if you use Mac; just click “Open”.
(5) “Import CLion Settings From” window may pop up. If so, click “Do not import settings” and hit the OK button.
(7) They will ask whether you want to share the data or not. It’s totally up to you, but I don’t prefer “Data Sharing”. Click either one.
(8) You might need to customize options, but I recommend the default setting. So, skip the customization if it pops up.
(9) Activate your student license with your account. If your student license was delayed, select “Start trial” for 30-day free use. Here is a screenshot from macOS; Windows should be similar.

(10) Now, you are almost ready to have fun! Just few more steps to welcome to the new world, “Hello, world!”
C++ Compiler Installation
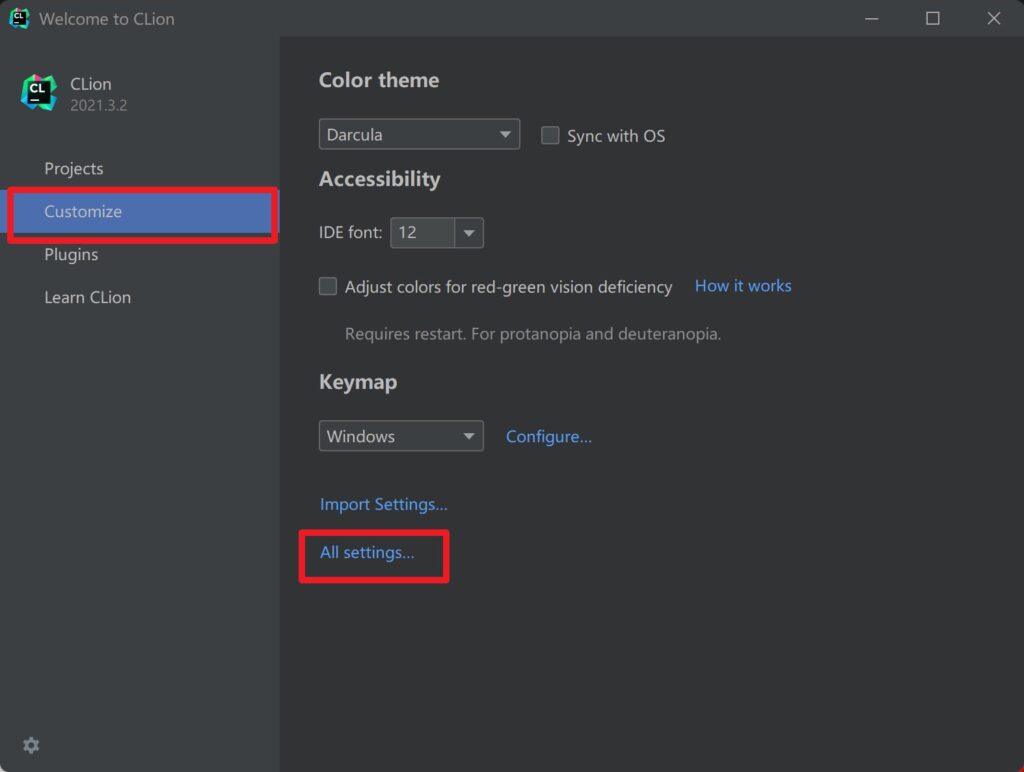
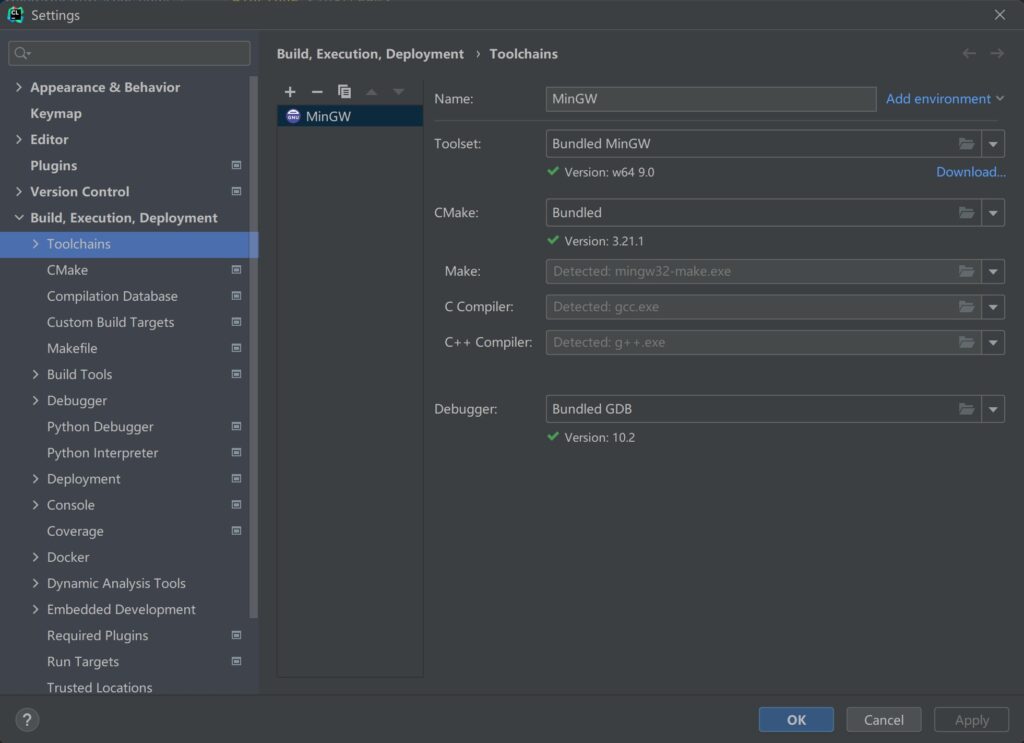
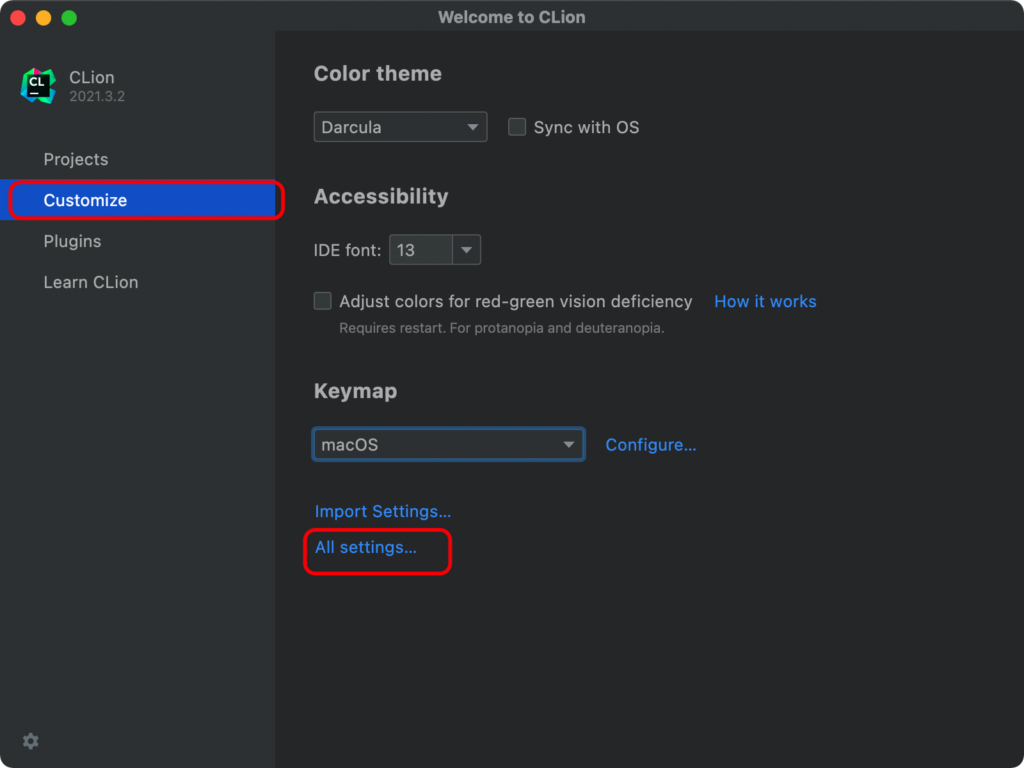
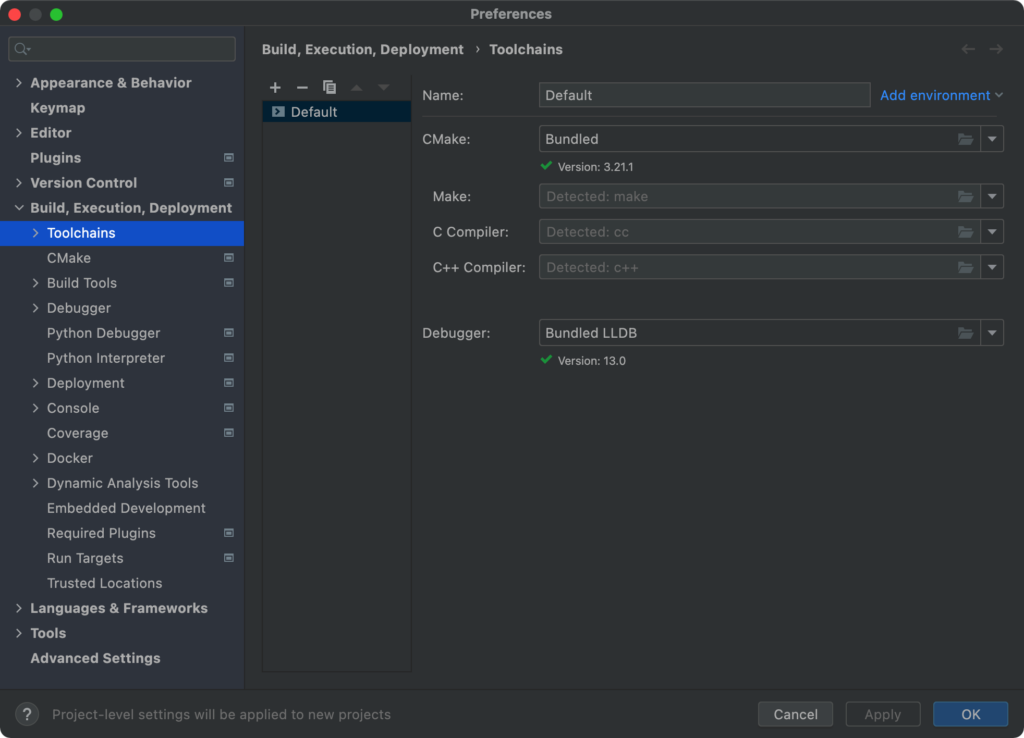
(1) This step might not be required for everyone, so please follow this step first to check if you need proceed. Go to “Customize -> All settings… -> Build, Execution, Deployment -> Toolchains”. If you see green checks under Toolset (only for Windows), CMake, and Debugger, and All of Make, C compiler, and C++ compiler showing detected, that means you are all set; just skip the following steps and go to “Validate Your Installation” section.
For Windows:
For macOS:
(2) If there is anything shown not the same as the above, please proceed to install C++ compiler.
For Windows:
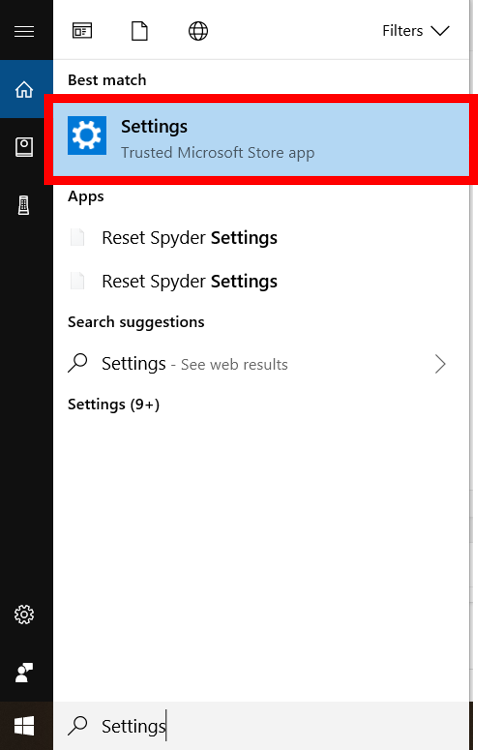
Step 1: First identify your system type. Type “Settings” in the search box at the lower left corner of your screen.
Step 2: Click on System.

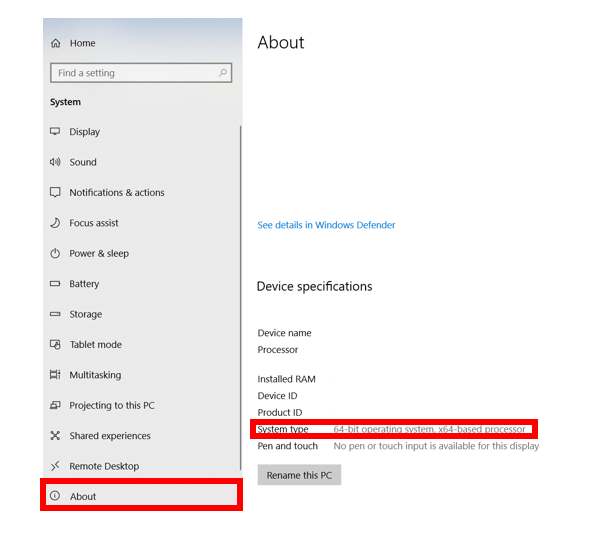
Step 3: In the window that opens, scroll down until you see the “about” item. Click on that. On my system, I saw this line:
- System Type: 64-bit operating system, x64-based processor.
On older systems, there is a System Info tab on the Control Panel that will tell you what system you have.
Step 4: for Windows system, use the “MinGW-W64” package for the PC.
Here to download the installer directly; here for more information on MinGW.
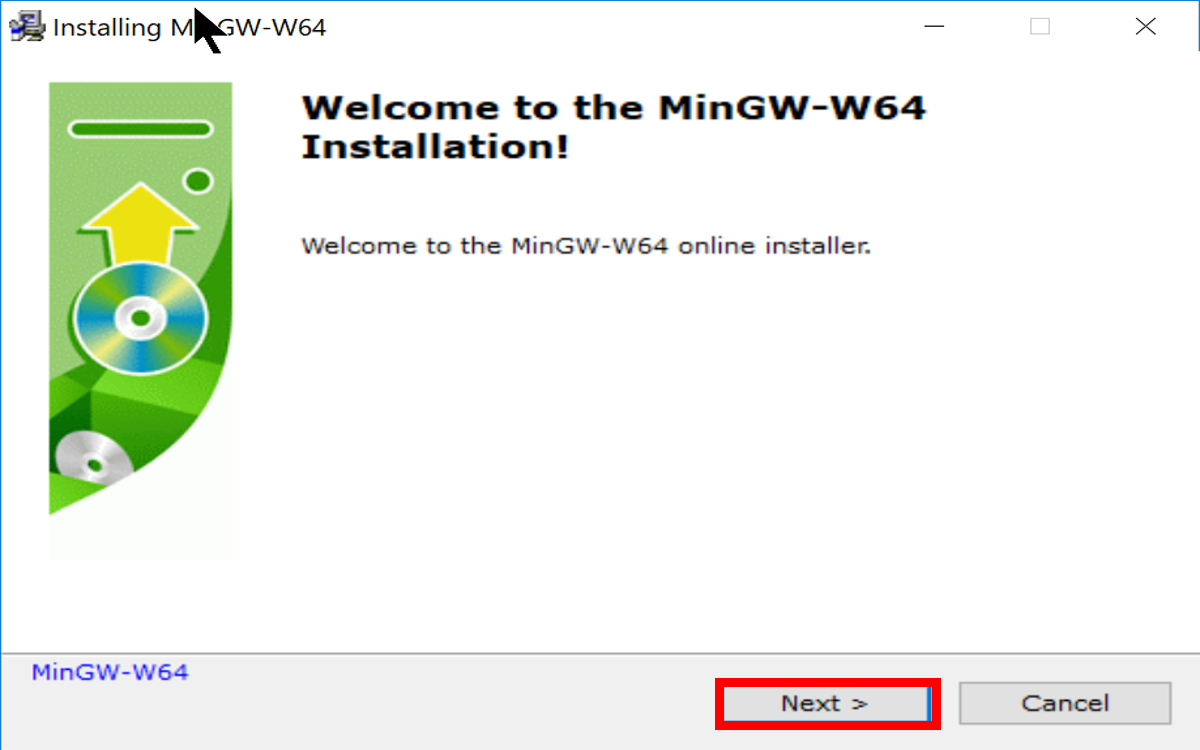
Step 5: Once that file is on your system, you can launch it by double-clicking on the file name. It should end up in your Downloads folder. Click on “Next”
Step 6: If you have a 32-bit system, click on “Next”.
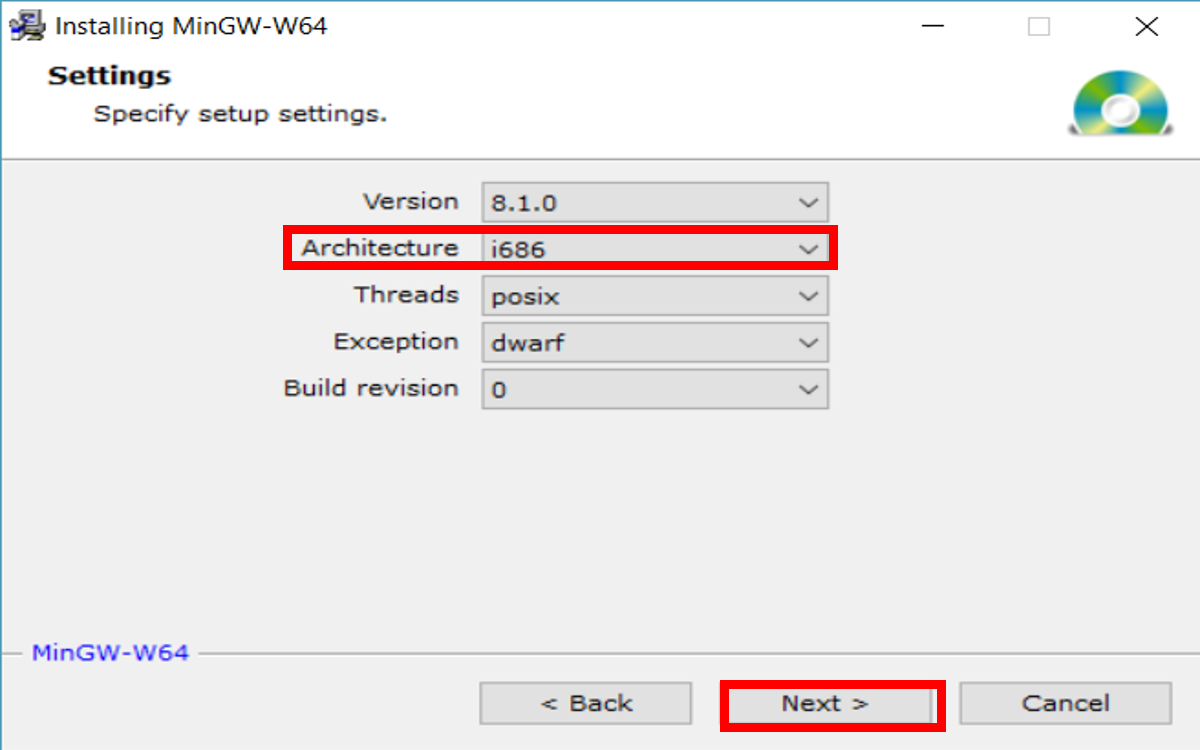
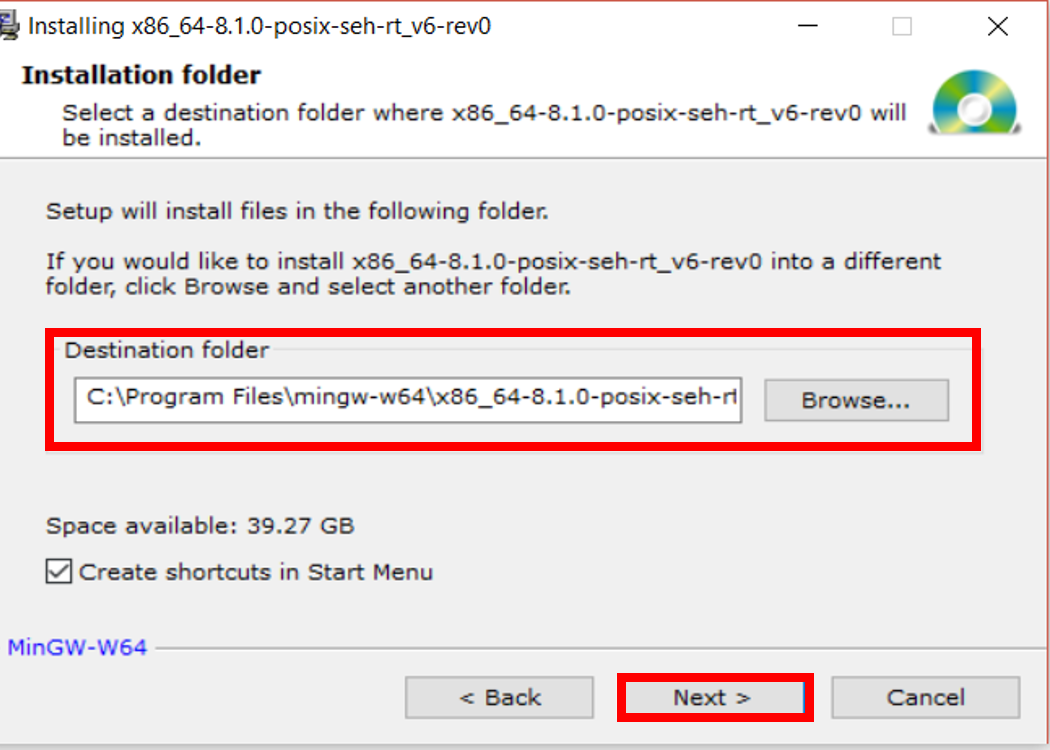
If you have a 64-bit system, you need to change these options so they look like this:

Step 7: Here is the next screen. There is no reason to change this, but note where the compiler is going to land. We may need that information later.
Step 8: In CLion go to “Customize -> All settings…>Build, Execution, Deployment” and choose “Toolchains“. It should automatically detect the compiler and its path and all the files.
If it does not do it automatically use the “browse” button (with the three dots) to find the files needed. The tools are these:
- Make: mingw32-make.exe
- C Compiler: x86_64-mingw32-gcc-8.1.0.exe
- C++ Compiler: x86_64-mingw32-g++.exe
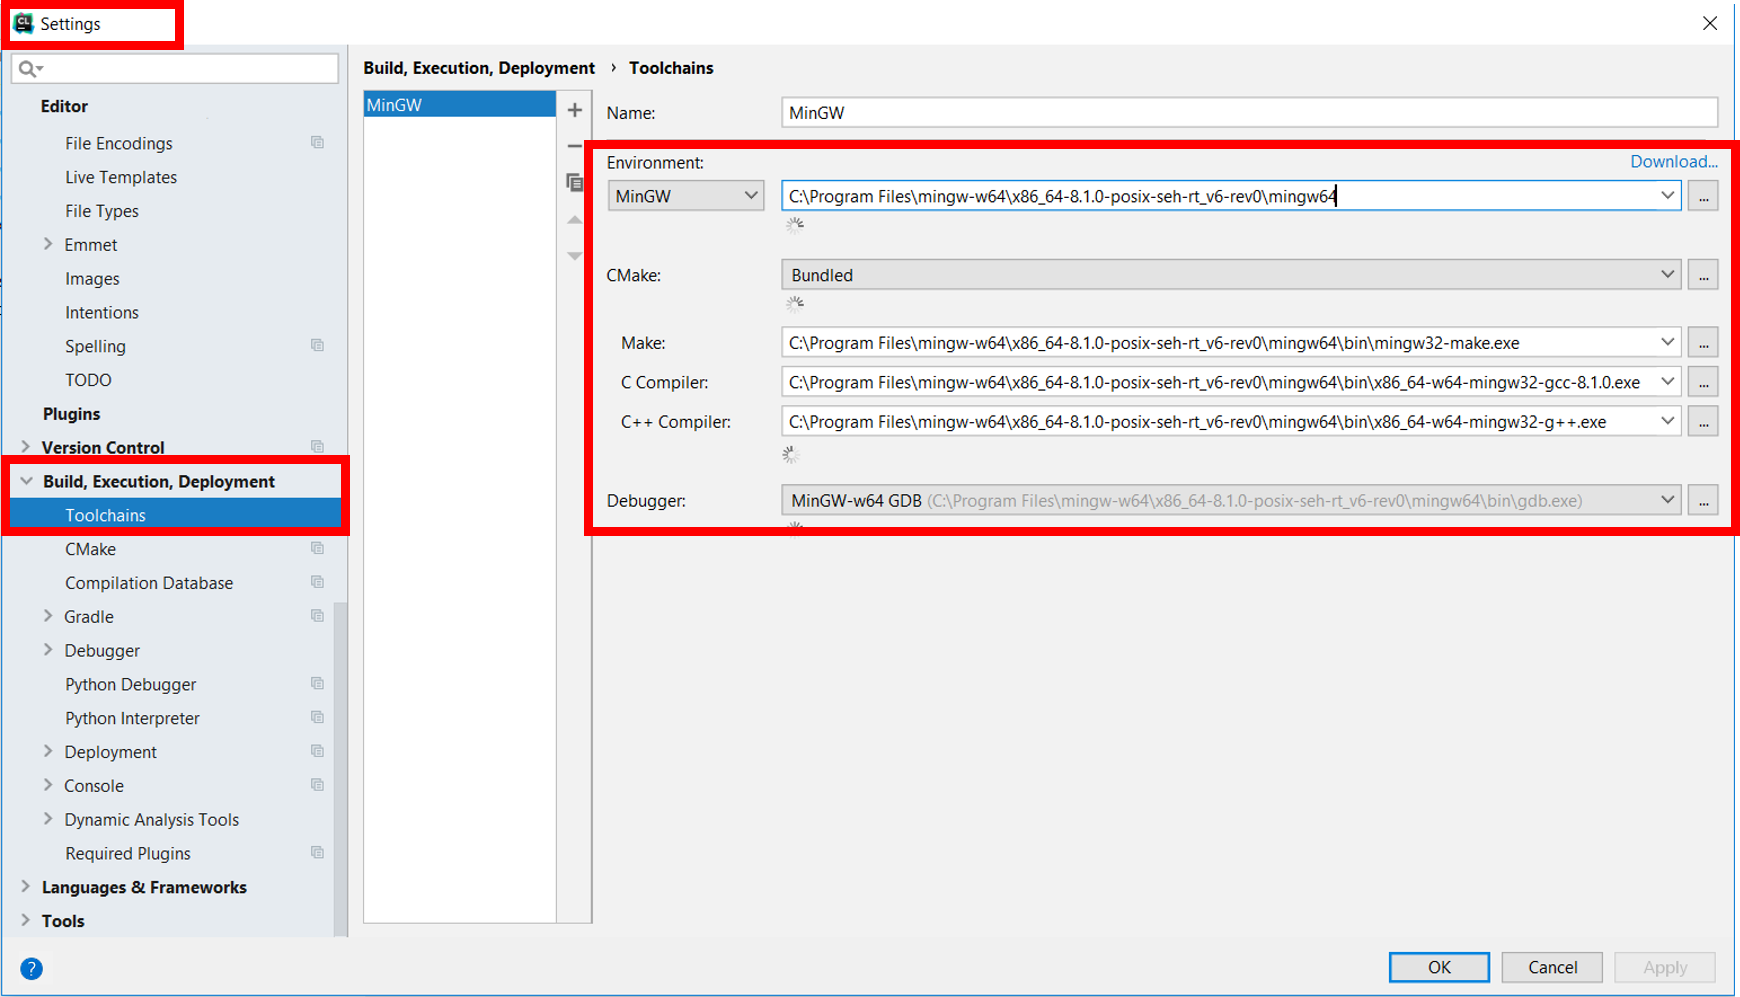
Wait for the green checks appear and then click OK to save.
For macOS:
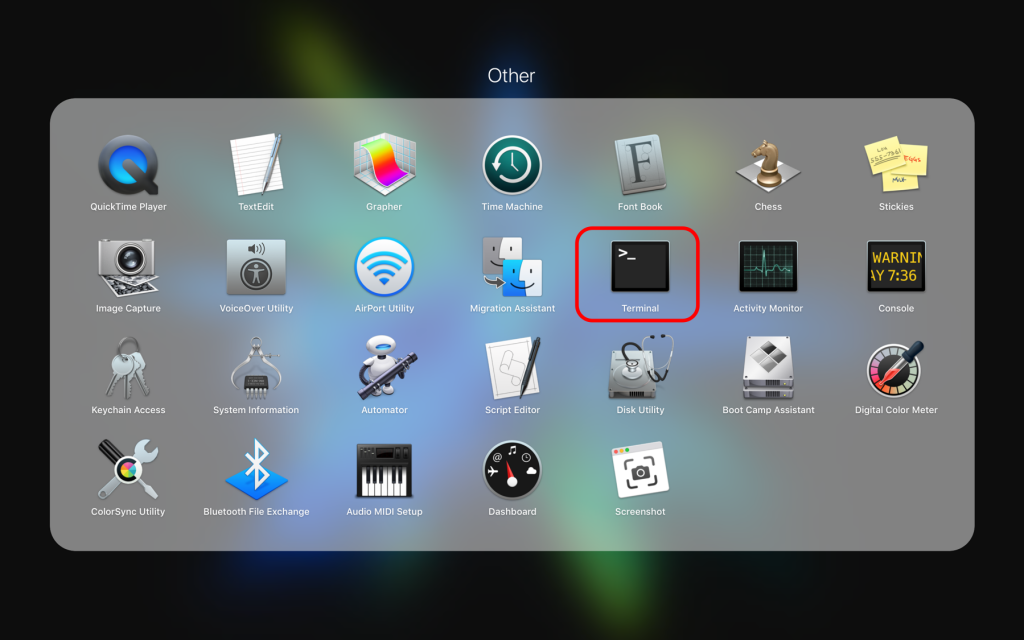
Step 1: Open the Terminal (You can find Terminal in Others on Launchpad or through Spotlight Search)
Step 2: Run the following command
xcode-select --install
Step 3: Hit the Install button. The process may take a little bit long. Just chill and you will be all set. Then follow Step (1) to check again.

Validate Your Installation
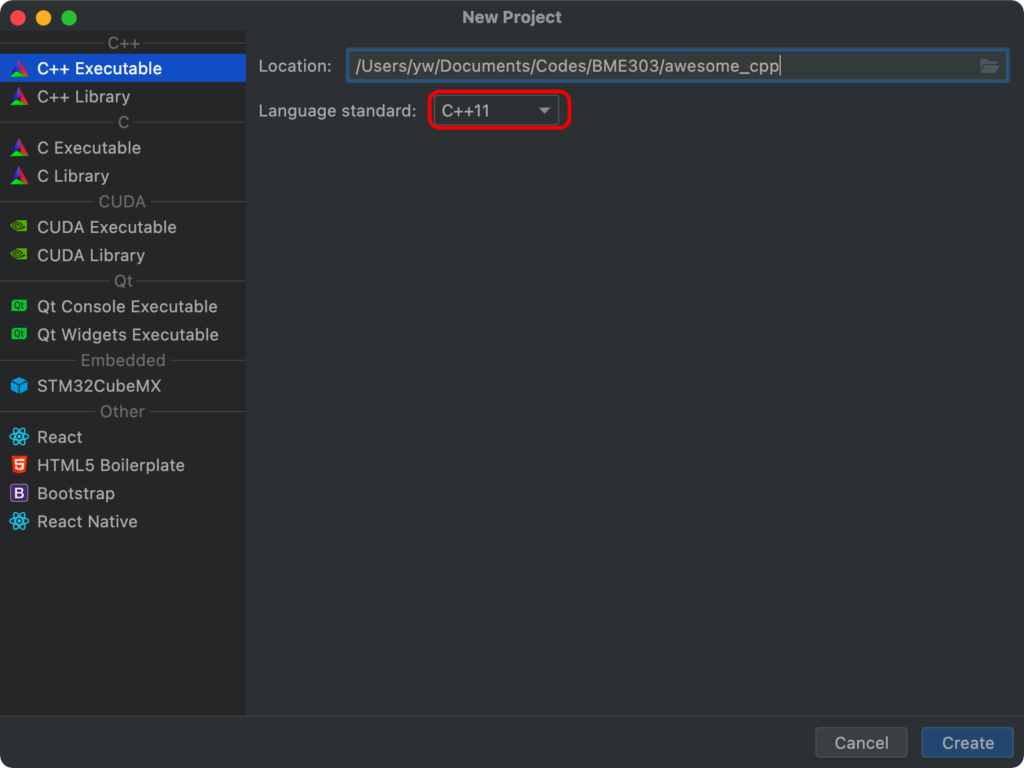
(1) Once the program is running, you need to create a new “Project”. Make sure C++11 is set as the language. It is important that you control where your projects live. Every tool like CLion thinks they have the right idea where to put things. I never leave this decision to any program. I like to organize my files in a way that helps ME find things. For school, I set up a folder for each class, then under that folder, I create another folder for each project. You can see where I decided to put this example project from the top line in this image: You should change the path for this project.

(2) Click on “Create” to build this project. Once the project is ready, you should see a basic “Hello, World” program in the edit window. If you compare this example program with examples you find in the book, there is one big difference right away. A typical “Hello World” example will look like this:
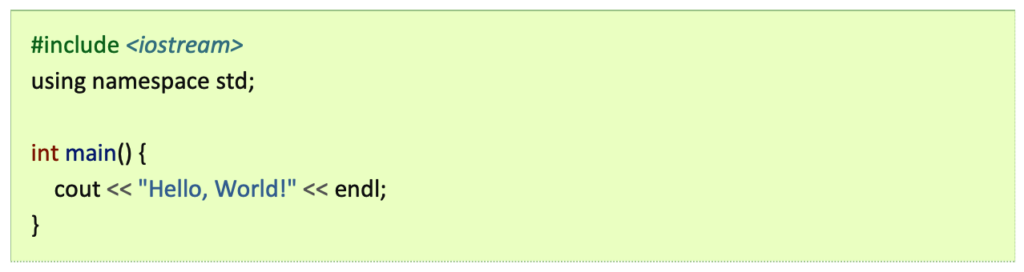
Notice that the CLion sample program does not include the “using namespace std;” line. Leaving that line out means we have to “qualify” both cout and endl, as shown in the CLion code. Since most examples in the book include that line, change this if you like. The compiler will tell you if something is wrong.
(3) Like the following, on the left side is a navigation panel. Click on the small triangle next to the “HelloWorld” line and you will see a list of all files in the project folder. Your code is in “main.cpp”. In the list of project files, you will see one named CMakeList.txt. This file is important. CLion uses a standard software tool named CMake to build your program (it comes with CLion). Build Your Program On the menu at the top, click on “Build” icon. You may be asked to do a bit of setup. If you see a form asking for the “Executable” name, select your project name. This will be the name used on the executable file the compiler will build. After finishing this form, the compiler will process your code. This will compile your program. If there are no errors, you can click on the “Run” icon to run your code. You will see the output in the bottom window. Any error you encounter will be displayed here as well.
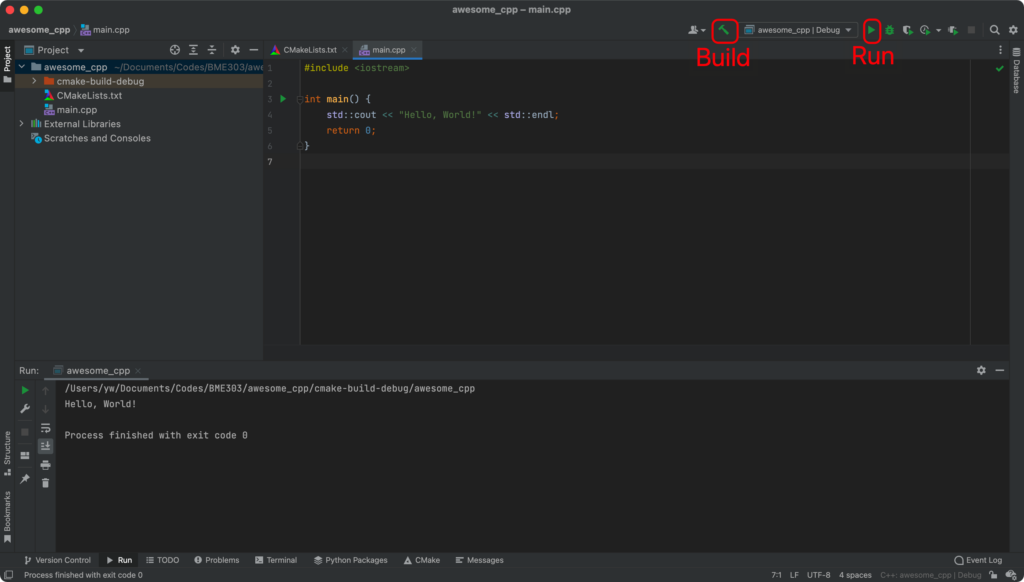
(4) If you see “Hello, World!” printed on the screen, Good job! You can start to explore the beautiful world with C++!