
Here’s the instruction on how to install PyCharm and Python interpreter on your PC/Mac. Please follow every step carefully and if you face any unexpected problems, please let TA/LAs know.
PyCharm Installation
(1) Make sure you have already completed to apply for a student license.
(2) Download PyCharm from JetBrains site. Both Professional and Community version are OK, although Professional version is recommended (From 2025, both versions are unified as single product, you can download that). Select your OS type (Windows/macOS) and then download it. If you use Macbook, make sure you select the right CPU type (Intel/Apple Silicon). The following steps are very similar to the installation of CLion.
For Windows:
(3) Click the downloaded .exe file to install. On the screen that asks you to create associations, select all.
For macOS:
(3) Click the downloaded .dmg file to install. Drag PyCharm icon to Applications folder.
(4) Now, you can find PyCharm icon and launch it! You might see a message “PyCharm is an app downloaded from the Internet ….” if you use Mac; just click “Open”.
(5) “Import PyCharm Settings From” window may pop up. If so, click “Do not import settings” and hit the OK button.
(7) They will ask whether you want to share the data or not. It’s totally up to you, but I don’t prefer “Data Sharing”. Click either one.
(8) You might need to customize options, but I recommend the default setting. So, skip the customization if it pops up.
(9) Activate your student license with your account. If your student license was delayed, select “Start trial” for 30-day free use.
(10) Now, you are almost ready to have fun! Just few more steps to welcome to the new world, “Hello, world!”
Python Installation (USUALLY NECESSARY)
You might not understand why you still need to install Python. Remember PyCharm is just an IDE (integrated development ENVIRONMENT) for python program development. You have made an environment, so this step shows how to install an actual interpreter python 3.8.
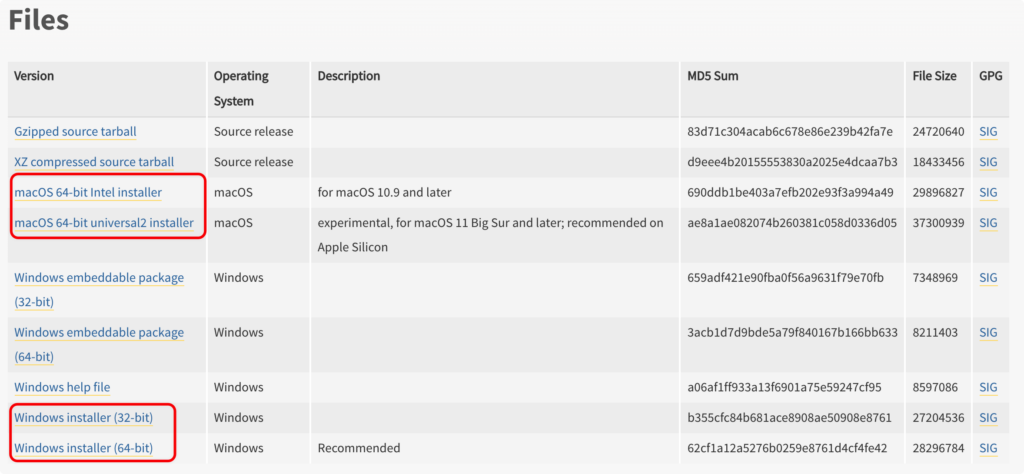
(1) Please download python3.8.10 installer from here (I recommend this version because it’s stable). Also, Select your OS type (Windows/macOS) and then download it. If you use Macbook, make sure you select the right CPU type (Intel/Apple Silicon).
(2) Open the installer and install it. Just follow the guidance on screen.
For Windows:
Check both “Install launcher for all users(recommended) and “Add Python to PATH”. Also, be aware of where python is installed; you will need it later.
For macOS:
You can check your installed python version and path by Terminal. In Terminal, Run python3 -V (V is uppercase) to check version and which python3 to check the path.
Validate Your Installation
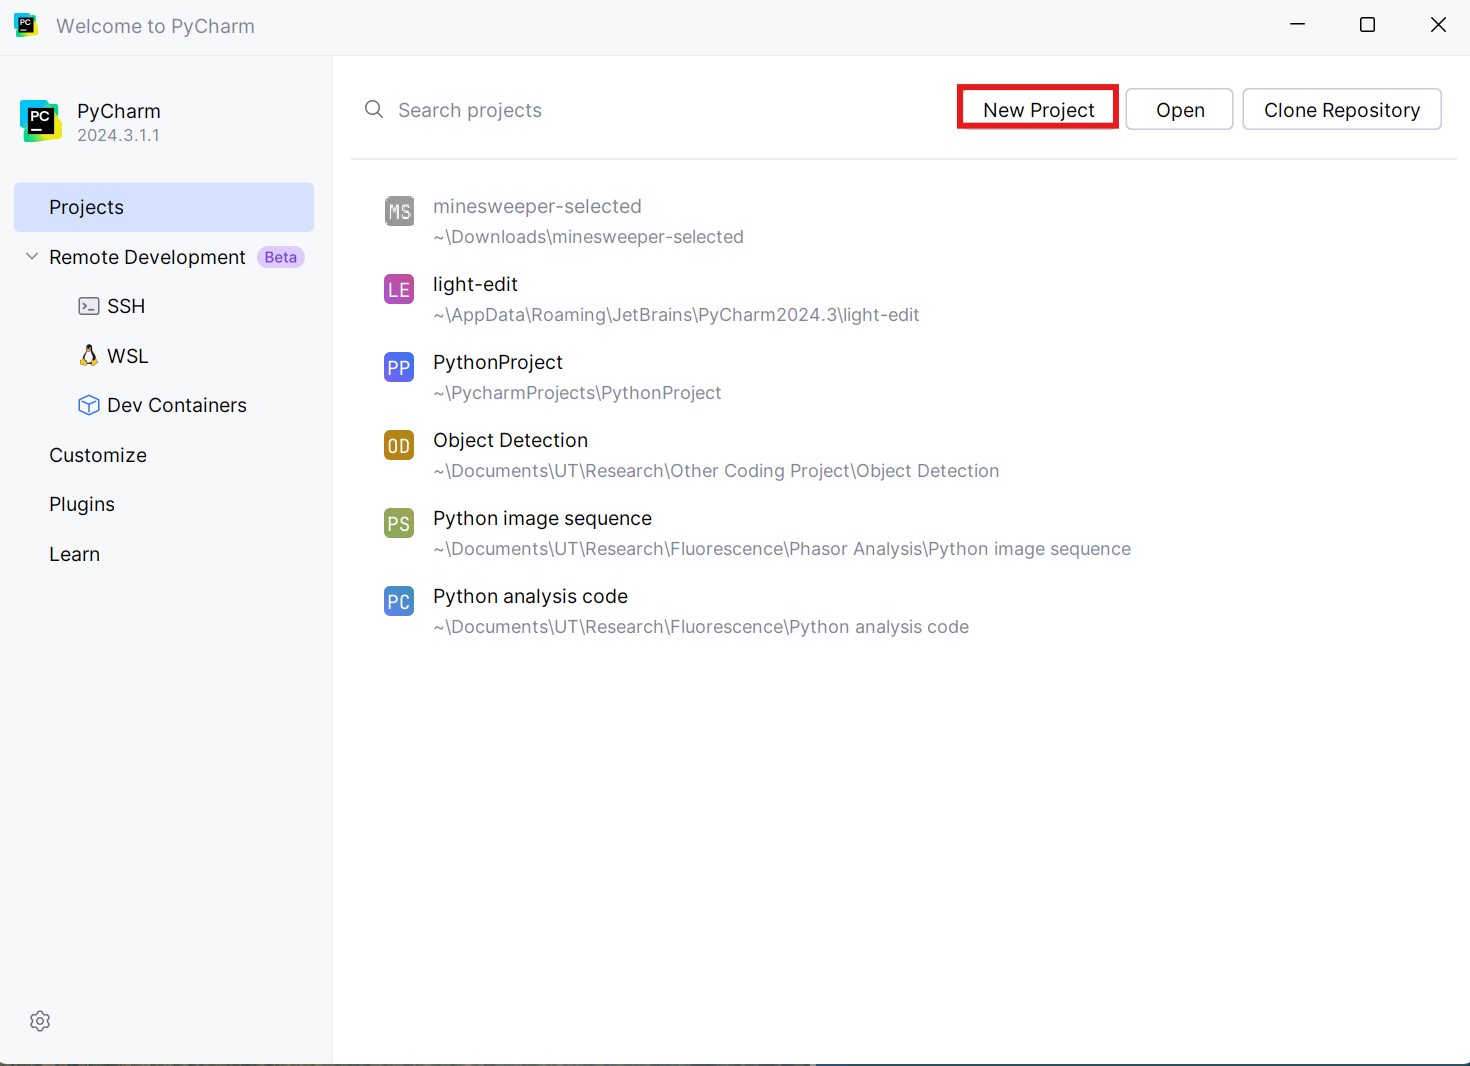
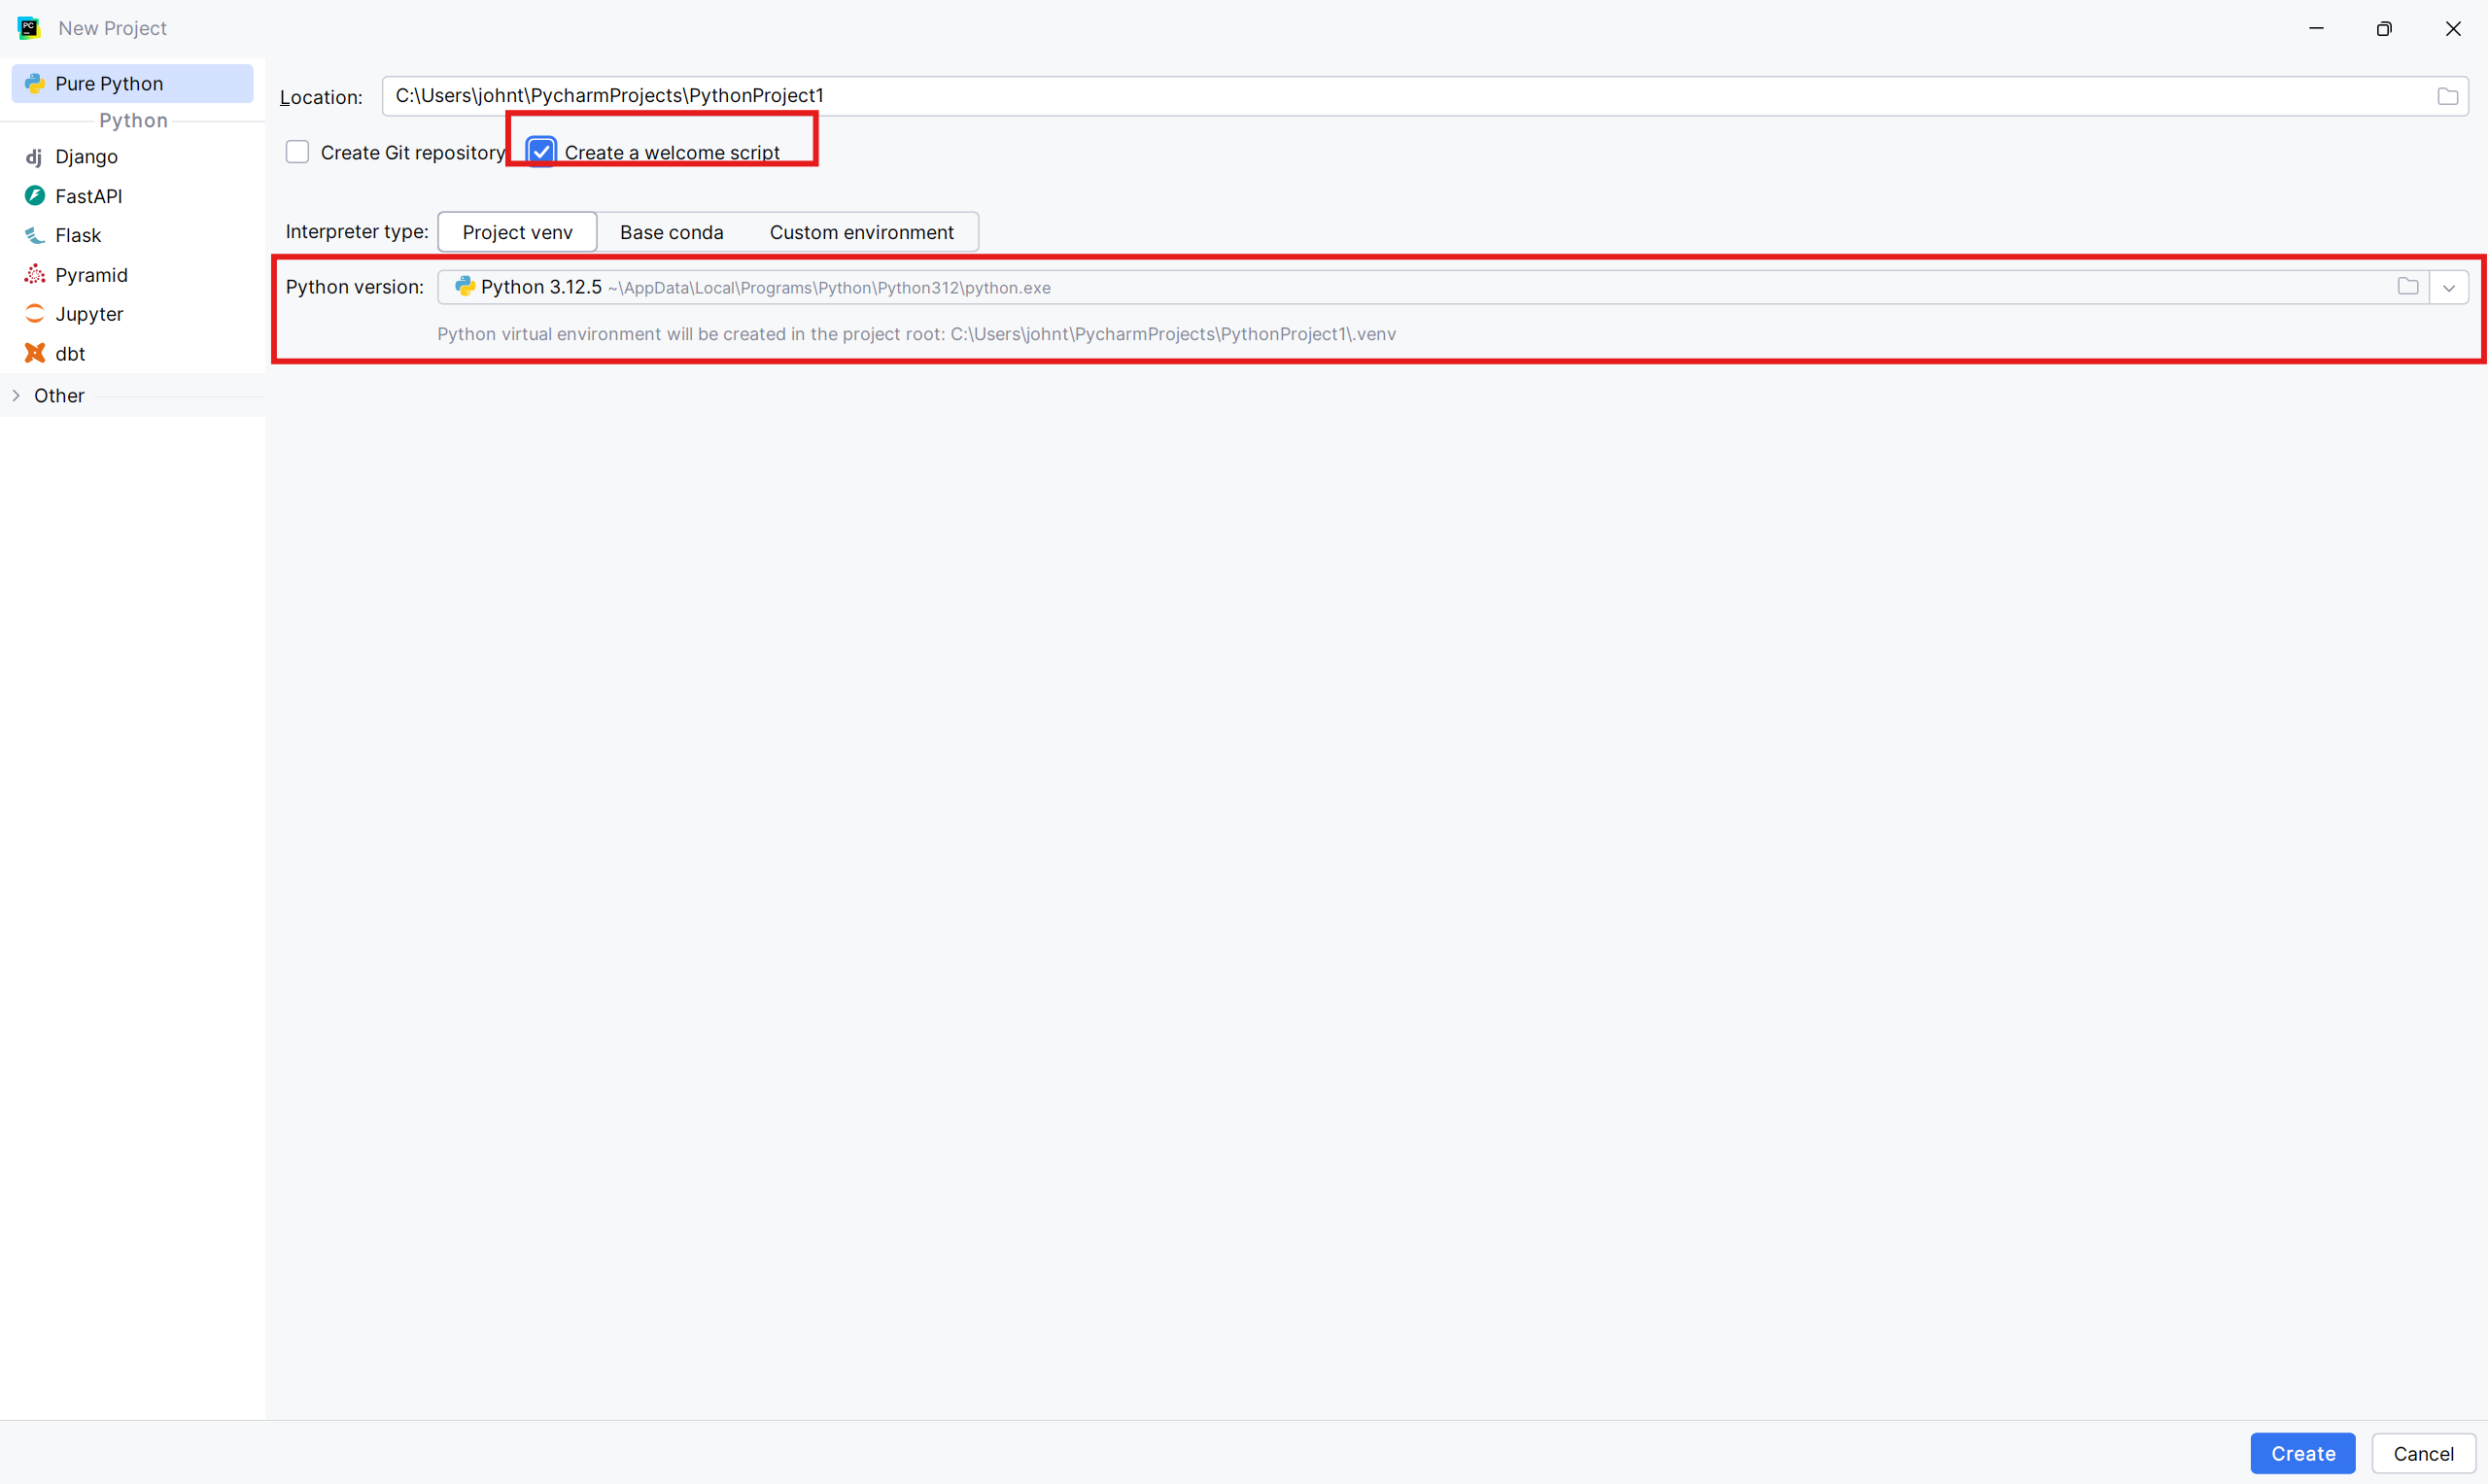
(1) Once the program is running, you need to create a new “Project”. Make sure to check if the interpreter is correctly selected and to check the box “Create a welcome script”.
-
-
- If the interpreter is not correctly selected, change the path to the python.exe file where it is installed in your computer
-
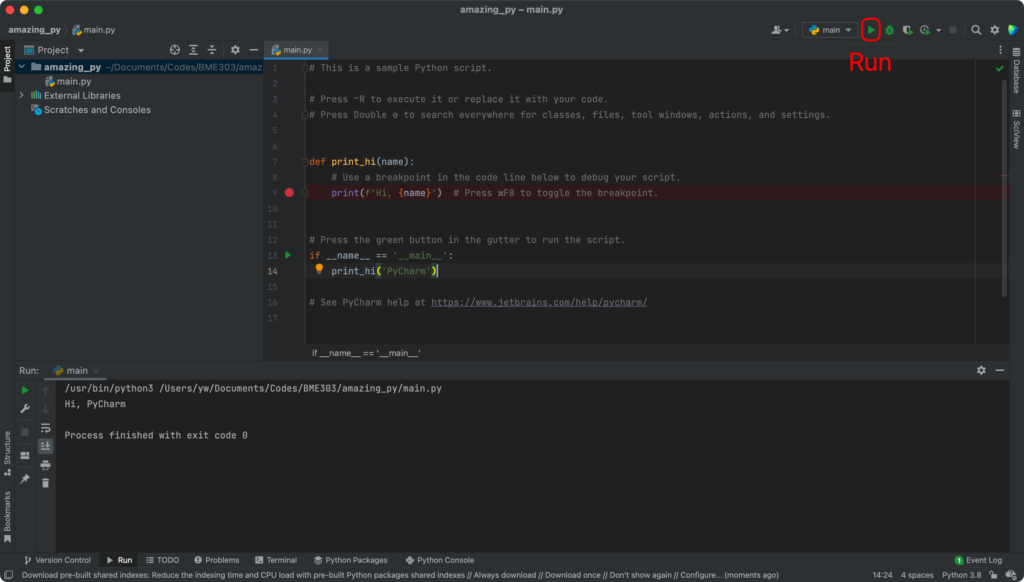
(2) Then you will see a “hello world” script. The GUI looks like CLion very much except there is no “build” for Python. You just need to click “Run” icon, and you will see “Hi, PyCharm” printed on the screen! Now, you’re all set. Enjoy!
Installing New Package for Python
PC: File | Settings | Project: xxx (maybe) | Python Interpreter | “+” | search for your interested package name | “Install Package”
MAC: PyCharm | Preferences | Project: xxx (maybe) | Project Interpreter | “+” | search for your interested package name | “Install Package”